Report Settings
Navigation: RootsMagic 8 > Reports And Charts >
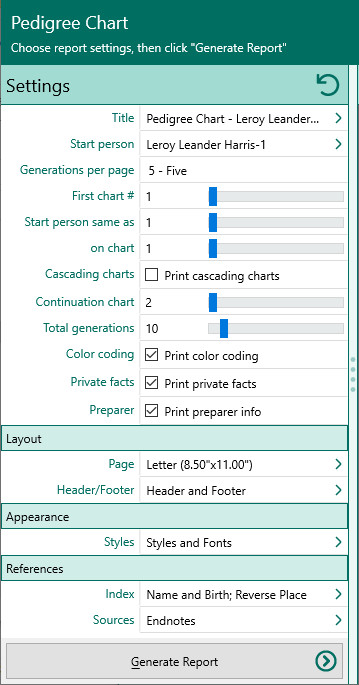
In addition to the specific settings for each type of report, some settings are available which apply to some or all of the reports, including page layout, styles, headers and footers, source and index options, colors, border styles, and picture settings. These settings will be below the specific settings for the report as shown below, and can be selected by clicking the item.
RootsMagic will slide in the appropriate settings edit panel.
Page layout
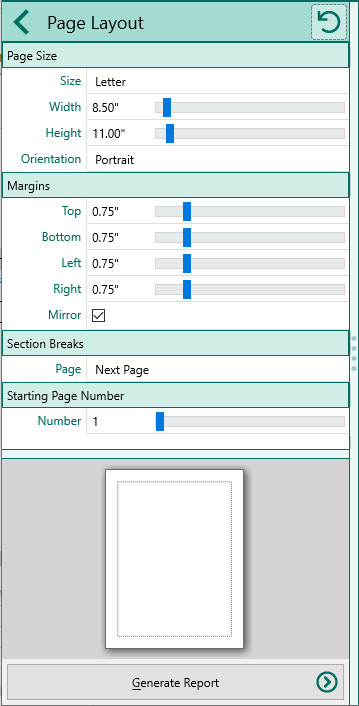
The Page Layout dialog lets you customize how your reports will be printed on the page. When you make changes to the page layout, it only affects the report type you are currently working on. For example, if you change the margins or header for a pedigree chart, those changes do not affect the margins or headers for family group sheets. The Page Layout dialog has two tabs, Page and Header/Footer.
Styles
Text
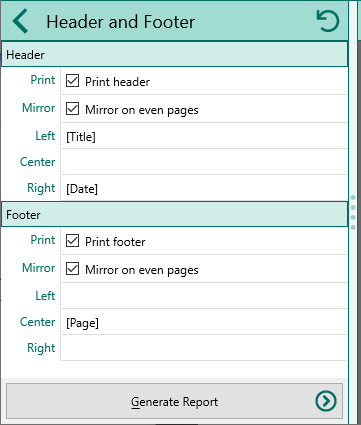
The Header/Footer tab allows you to customize the way headers and footers are printed on the page.
- Header – Settings that affect the header at the top of each page of this report.
- Print header – Mark this checkbox if you want RootsMagic to print a header at the top of each page of this report.
- Mirror header on even pages – Mark this checkbox if you want RootsMagic to swap the left and right header sections on even pages. This is useful when you are printing on both sides of the page and want, for example, a page number to be on the outside part of the header.
- Footer – Settings that affect the footer at the bottom of each page of this report. The options are the same as described above for the Header.
- Left section – Enter the text that you want printed left justified at the left of the header (or footer), and choose the font, the size, and bold, underline, italic and or strikeout attributes You can enter any text you desire in this area. There are 5 special values you can enter here:
- [Title] – RootsMagic will replace this with a title designed specially for this printout
- [Date] – RootsMagic will replace this with the current date
- [Page] – RootsMagic will replace this with the current page number
- [File] – RootsMagic will replace this with the name of the current database
- Center section – Enter the text that you want printed centered in the header (or footer). You can use any of the special values described above as well.
- Right section – Enter the text that you want right justified at the right of the header (or footer). You can use any of the special values described above as well.
NOTE: The footer section works exactly the same as the header section described above, except that the footer is printed at the bottom of the page.
Header and Footer margins – Enter the number of inches (or fractions of inches) that the header and footer should print from top and bottom of the paper, respectively.
Source options
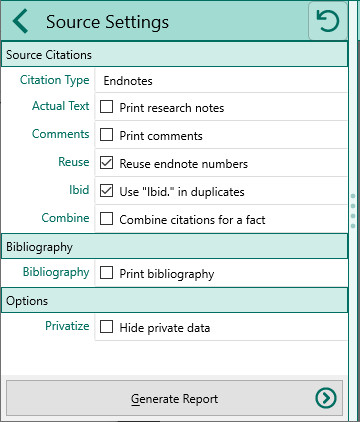
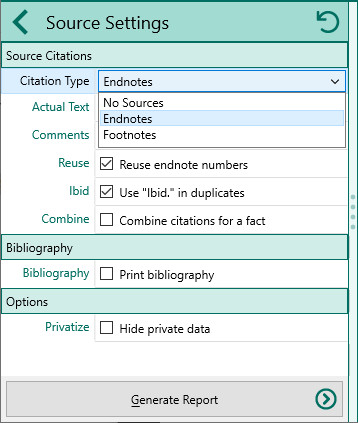
The source print options dialog lets you select how you want sources to print in certain reports. You can choose from:
Select this tab to control how sources are print in endnotes or footnotes
- Citation type – Select how you want citations to appear in your report:
- No endnotes and footnotes citations – Select this option if you don’t want sources to print in the report.
- Endnotes printed at the end of the document – Print endnotes on a separate page.
- Footnotes printed at the bottom of each page – Print footnotes at the bottom of each page.
- Options – Select the options you wish to include in your report:
- Print detail text of sources with each citation – Print the actual citation text with the source.
- Comments about citation – Print the citation comments with the source.
- Reuse endnote numbers where possible – Causes duplicate citations to only be printed once. This can drastically reduce the size of your list of sources.
- Use "Ibid." in consecutive duplicate citations – Select this option if you want to use Ibid. when duplicate citations appear consecutively in the report
- Combine all citations for a single fact – Select this option to have RootsMagic combine multiple citations into one footnote, thus eliminating multiple reference numbers beside a fact
- Bibliography – Select this tab if you want each source printed at the end of the document. The bibliography is list of sources printed in alphabetical order, without reference numbers pointing to them.
- Print bibliography of sources used – Check this box if you want to print the list of sources on a separate page.
- Options – Select the tab to choose whether to show or hide private data.
- Hide private data in the endnotes, footnotes, and bibliography – Checking this option tells RootsMagic to hide private data so the non-private data in the source field will appear in the report. If the source template includes something like <![StreetAddress]|<sc>Address for private use</sc>>, and the field contained "123 Any Street?, "Address for private use" would appear by default, and "123 Any Street" would appear if this checkbox was unchecked.
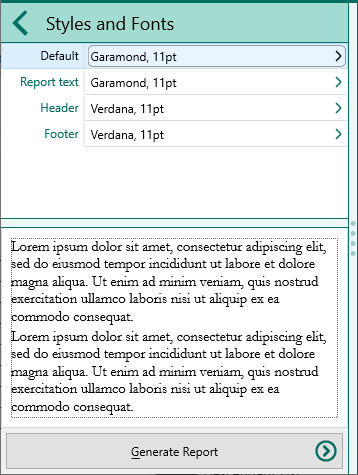
- Fonts – The Fonts button lets you choose the font used for the source text and for the source page title.
- Click OK to save the settings, or Cancel to exit the dialog without saving any changes.
Index options
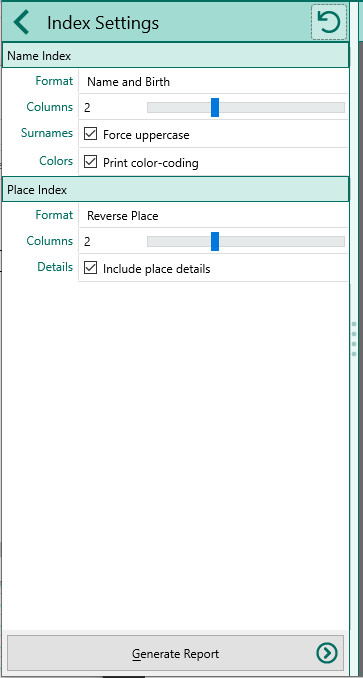
A number of the RootsMagic reports, as well as the RootsMagic Publisher, allow you to print an index of the people and an index of places in the report. RootsMagic provides three tabs, Name Index, Place Index, Fonts.
- Name Index – Select this tab to control how the name index will appear
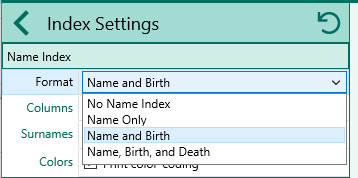
- Format – Select how you want to format the index entries
- No Name Index – Select this option if you don’t want a name index
- Name Only – Select this option if you want the name index to display the name only
- Name and birth – Select this option if you want the name index to display the name and birth year
- Name, birth, death – Select this option if you want the name index to display the name with the birth and death years
- Options – Select how you want to format the index entries
- Columns – Select this option if you don’t want an name index to print in the report.
- Force surnames to uppercase – Check this box if you want the surnames to be shown in uppercase in the report
- Place Index – Select this tab to control how the name index will appear
- Format – Select how you want to format the index entries
- No Place Index – Select this option if you don’t want a place index
- Place – Select this option if you want the entries in the place index to appear in their usual order, smallest to largest, e.g. Bolton, Lancashire, England
- Reverse place – Select this option if you want the entries in the place index to appear in reverse order, largest to smallest, e.g. England, Lancashire, Bolton. This groups the places by countries, then counties, provinces or states within the country, etc.
- Options – Select how you want to format the index entries
- Columns – Choose whether to print one, two, or three columns in the index
- Include place details – Choose whether to include place details in the index
- Fonts – The Fonts tab lets you choose the font used for the two indexes
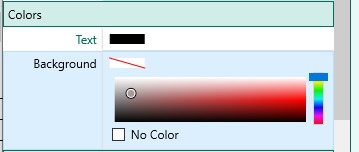
Chart Colors
Text
Box borders
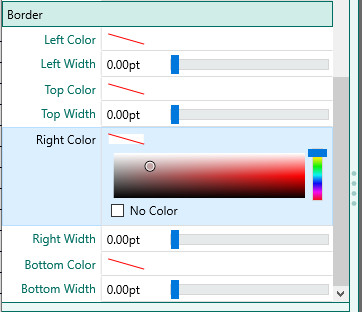
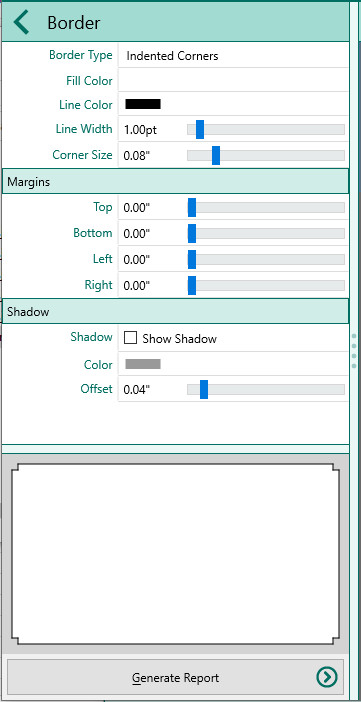
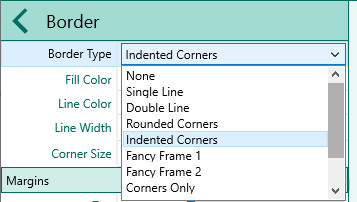
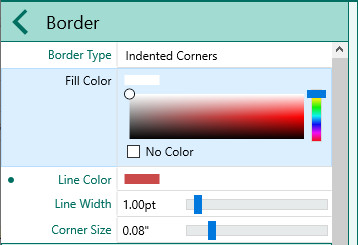
Some reports and charts allow you to print boxes around information. The Border Style dialog lets you choose the format of these borders.
- Border Type – Choose the style of border from the list. The display to the right of the list will show you what the border will look like.
- Draw Shadow – Mark this checkbox if you want the border to have a drop shadow.
- Offset – Click this up/down arrows to select an offset for the shadow (the default is 3).
- Line color – Click this button to select the line color for the box.
- Fill color #1 – Click this button to select the color for the inside of the box.
- Fill color #2 – Click this button to select the color for the inside of the box.
- Shadow color – Click this button to select the color for the shadow.
Picture settings
Text
