Difference between revisions of "RootsMagic 8:Editing Media Items"
Jump to navigation
Jump to search
| (7 intermediate revisions by 2 users not shown) | |||
| Line 3: | Line 3: | ||
---- | ---- | ||
| − | + | To edit a media item, do one of the following: | |
| + | *Select the Media page, and select the media you want to edit from the thumbnail view or the media list | ||
| + | *Highlight a fact on the Edit Person form, then click the Media button on the right side edit panel | ||
| + | [[File:RM8_EditPerson-Panel-EditMedia-1.jpg|Edit media]] | ||
| − | + | You can edit the following information for the media: | |
| − | + | You can enter the following information for the media item: | |
| − | + | *'''Media type''' - the type of media (Image, File, Sound, or Video). | |
| − | + | *'''Filename''' - the file name of the media item (full path). You can either type in the full path name, or click the file icon on the far right of the filename field to select the file from the Open File dialog | |
| + | *'''Caption''' - a brief (one line) caption for the media item | ||
| + | *'''Description''' - a more detailed description for the media item. Clicking this field will slide in the note editor to enter your description. | ||
| + | *'''Date''' - an optional date for the media item. This can be used for any purpose you want, such as the date a photo was taken, or the date you entered it into the program. | ||
| + | *'''Ref#''' - you can enter an optional reference number here. This is solely for your own use. | ||
| + | If you are editing the media from the Edit Person form, you will also see 2 additional options: | ||
| + | *'''Scrapbook''' - check this box to include this photo in the scrapbook for the person | ||
| + | *'''Primary''' - Make this the primary photo for the person | ||
| + | RootsMagic will also display the number of records which are currently using this media item. Click on the Tags link to see a list of every place the media item is used. | ||
| − | + | [[File:RM8_Media-ViewImage-1.jpg|View Image]] | |
| − | |||
| − | Image | ||
| − | |||
| − | + | [[File:RM8_Media-ViewImage-2.jpg|View Image Description Note]] | |
| − | |||
| − | |||
| − | |||
| − | |||
| − | |||
| − | |||
| − | |||
| − | |||
| − | |||
| − | |||
| − | |||
| − | |||
| − | |||
| − | |||
| − | |||
| − | |||
| − | |||
| − | |||
| − | |||
| − | |||
| − | |||
| − | |||
| − | |||
| − | |||
| − | |||
| − | |||
| − | |||
| − | |||
| − | |||
| − | |||
| − | |||
| − | |||
| − | |||
| − | |||
| − | |||
| − | |||
| − | |||
| − | |||
| − | |||
| − | |||
| − | |||
| − | |||
| − | |||
| − | |||
| − | |||
| − | |||
| − | |||
| − | |||
| − | |||
| − | |||
| − | |||
| − | |||
| − | |||
| − | |||
| − | |||
| − | |||
| − | |||
| − | |||
| − | |||
| − | |||
| − | |||
| − | |||
| − | |||
| − | |||
| − | |||
| − | |||
| − | |||
| − | |||
| − | |||
| − | |||
| − | |||
| − | |||
| − | |||
| − | |||
| − | |||
| − | |||
| − | |||
| − | |||
| − | |||
| − | |||
| − | |||
| − | |||
| − | |||
| − | |||
| − | |||
| − | |||
| − | |||
| − | |||
| − | |||
| − | |||
| − | |||
| − | |||
| − | |||
| − | |||
| − | |||
| − | |||
| − | |||
| − | |||
| − | |||
| − | |||
| − | |||
| − | |||
| − | |||
| − | |||
| − | |||
| − | |||
| − | |||
| − | |||
Latest revision as of 19:02, 3 August 2022
Navigation: RootsMagic 8 > Working With Media >
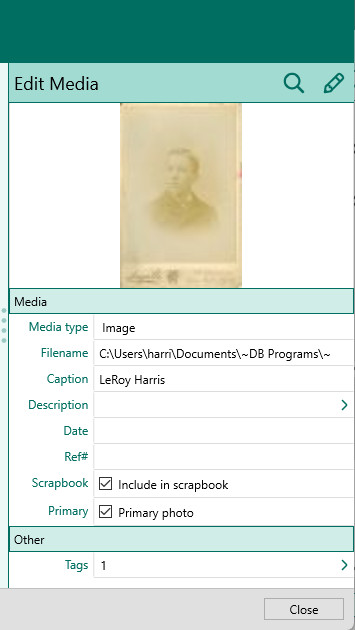
To edit a media item, do one of the following:
- Select the Media page, and select the media you want to edit from the thumbnail view or the media list
- Highlight a fact on the Edit Person form, then click the Media button on the right side edit panel
You can edit the following information for the media: You can enter the following information for the media item:
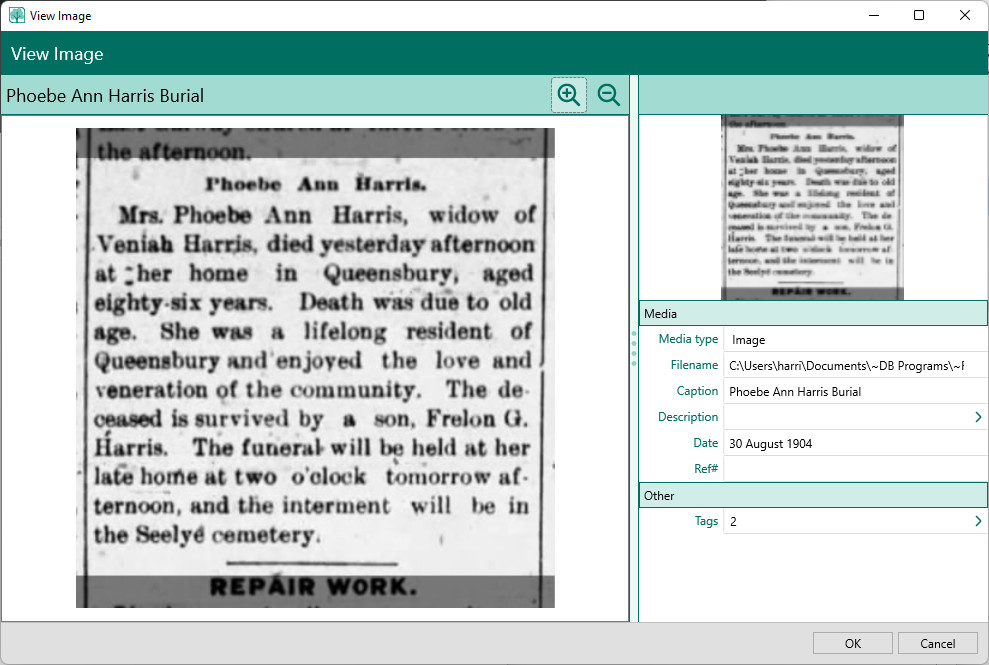
- Media type - the type of media (Image, File, Sound, or Video).
- Filename - the file name of the media item (full path). You can either type in the full path name, or click the file icon on the far right of the filename field to select the file from the Open File dialog
- Caption - a brief (one line) caption for the media item
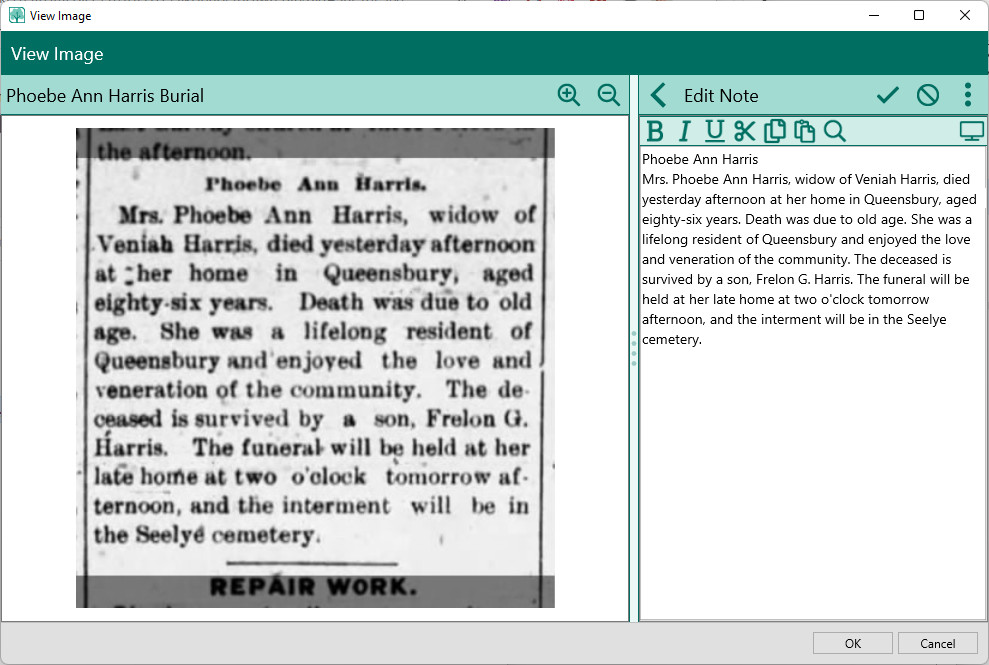
- Description - a more detailed description for the media item. Clicking this field will slide in the note editor to enter your description.
- Date - an optional date for the media item. This can be used for any purpose you want, such as the date a photo was taken, or the date you entered it into the program.
- Ref# - you can enter an optional reference number here. This is solely for your own use.
If you are editing the media from the Edit Person form, you will also see 2 additional options:
- Scrapbook - check this box to include this photo in the scrapbook for the person
- Primary - Make this the primary photo for the person
RootsMagic will also display the number of records which are currently using this media item. Click on the Tags link to see a list of every place the media item is used.


